長らくAWSやGCPと言ったモダンクラウド環境に触れていなかったので、無職期間を利用して基本的な部分を触っておくことにしました
まずは3大クラウドで最も高いシェアを誇る「AWS」を学習ターゲットとしました
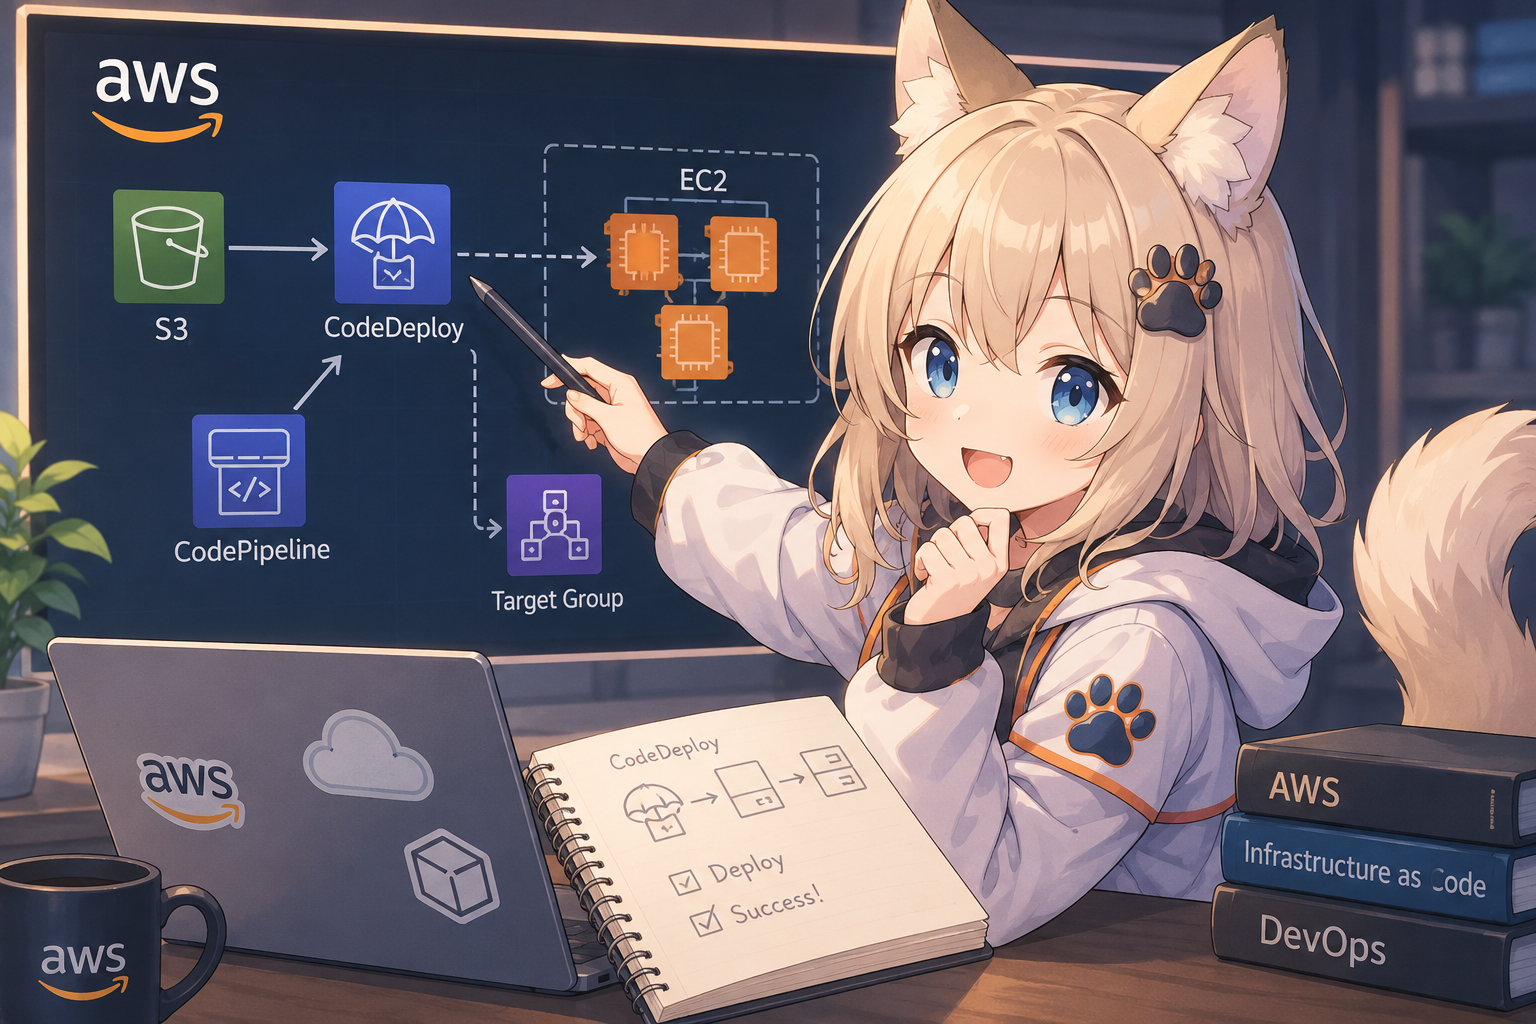
学習メニューはClaudeさんと相談し、AWSについては「EC2インスタンス作成からCodeDeployを利用してCD環境を作ってみる」ということで進めてみることにしました
はじめに
本記事ではAWSの演習を目的としており、以下の実践内容を記事にしています
・EC2インスタンス作成
・AWS作業用ユーザー作成
・Wordpress動作環境の構築
・GitHub Actionの設定
・CodeDeployの設定
本環境については演習後に破棄する前提で作業を進めているため、IAMの設定は多少権限が強いものを設定しています
あらかじめご了承ください
最初に、請求アラートを設定
AWS利用において必須なのが請求アラート設定です(個人の感想)
これは、請求金額が一定額を超えた場合、お知らせしてくれる機能ですね
AWSは従量課金なので万が一使いすぎてしまった場合に多額の請求が発生することがあります
請求アラートを設定することで、想定外の請求金額となった場合、早めに気がつくことができます
設定方法はAWSコンソール画面のアップデートで変更となる可能性があるので、以下の手順は2026/6時点の参考としてください
AWSコンソール
  → 右上のアカウント名クリック
  → 「請求とコスト管理」
  → 左メニュー「請求設定」
  → 「アラート設定」「AWS 無料利用枠アラート」にチェック
  → 保存
請求額はCloudewatchで監視するようなので、こちらも設定
AWSコンソール
 → https://us-east-1.console.aws.amazon.com/cloudwatch/home?region=us-east-1#home:
 → 左メニュー「アラーム」
 → 右上「アラーム作成」
 → メトリクスの選択で「EstimatedCharges」を選択してメトリクスを追加
 → 条件を「静的」「しきい値以上」「3(ドル)」で次へ
 → アラーム状態トリガー「アラーム状態」、通知の送信先:BillingCharges
 → 名前をつける
 → アラームの作成を押して終了
※AWSコンソールのURLはお使いのリージョンによって変わります
※しきい値はご自身の予算に合わせて設定してください
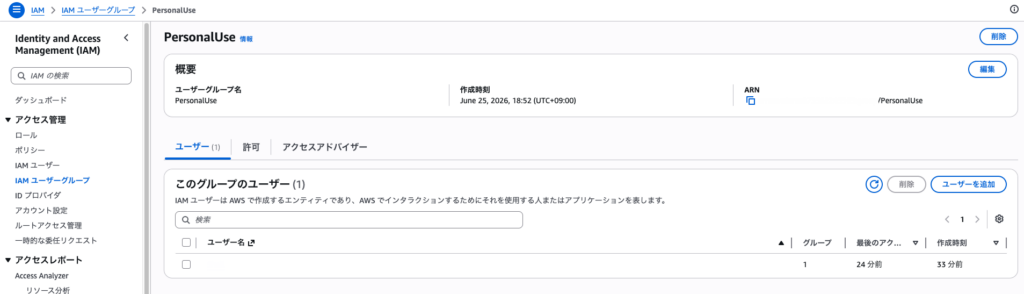
IAMユーザーを作成する
通常作業用のユーザーを作成します
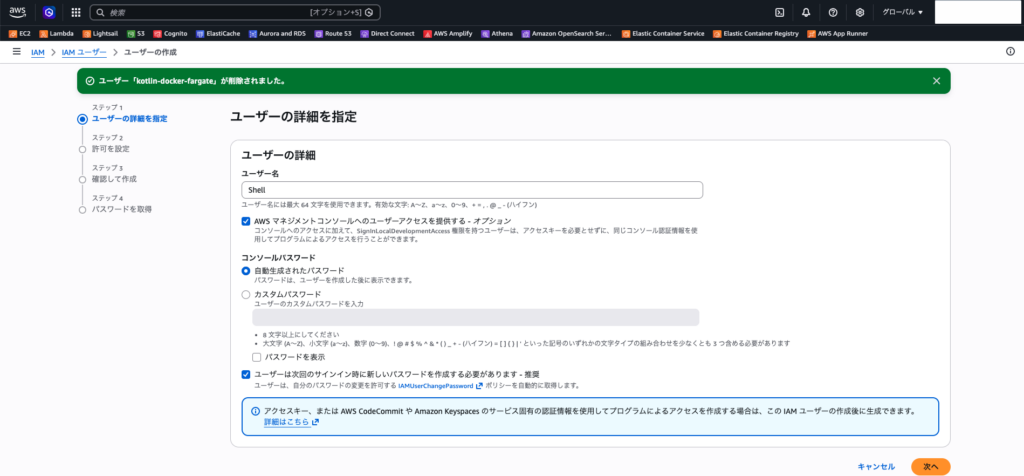
今回はあくまでCD構築に利用するユーザーとなるため、EC2のインスタンス作成/停止などが行える強めの権限を持つ「PowerUserAccess」を設定しています
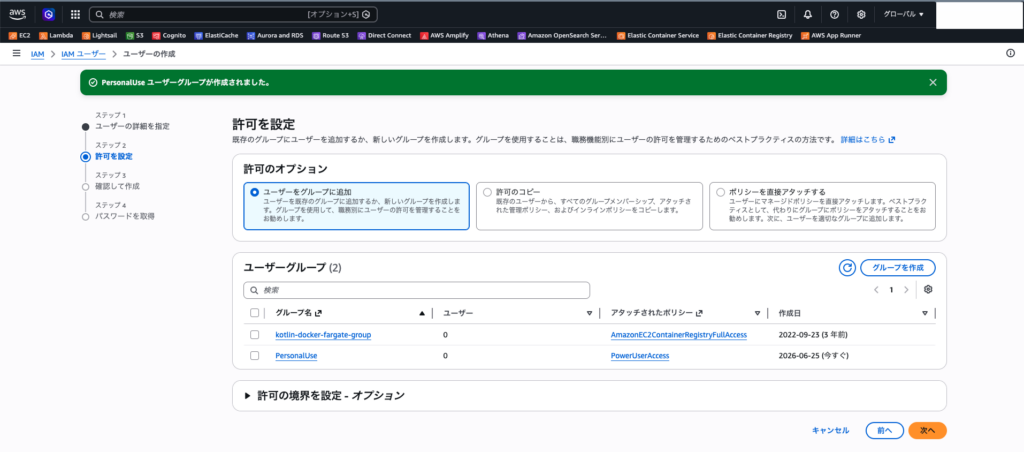
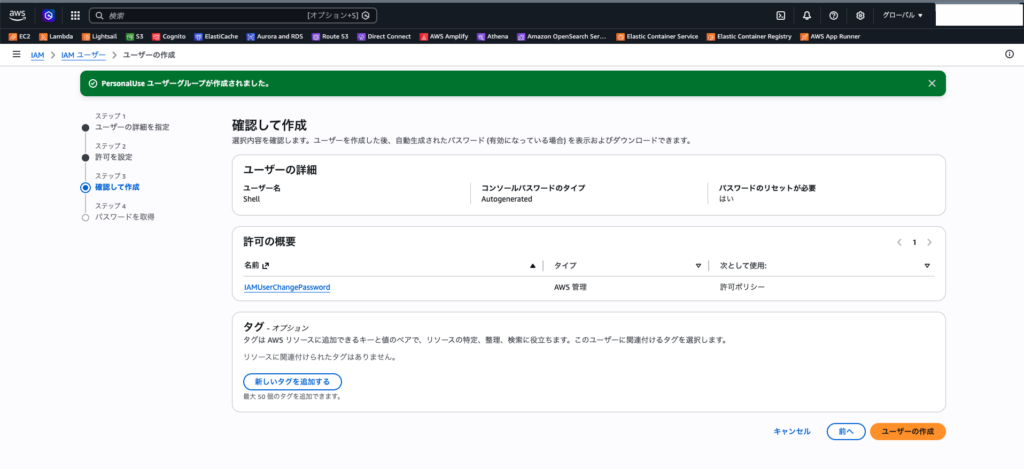
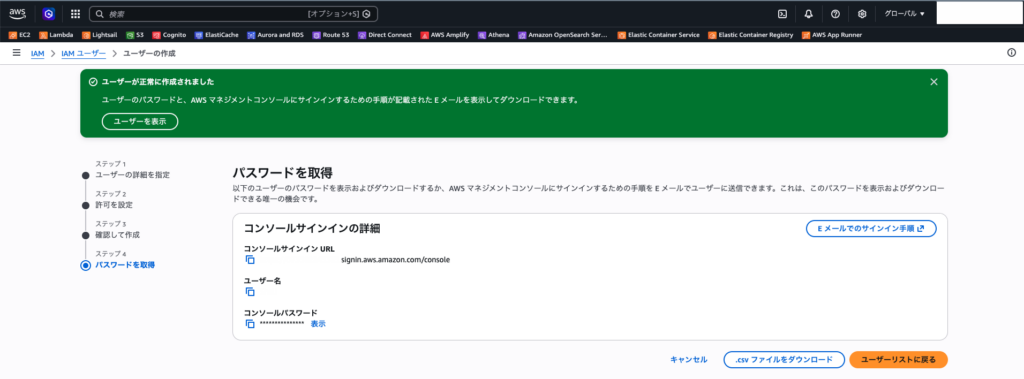
作成したユーザーはユーザーグループに追加する必要があります
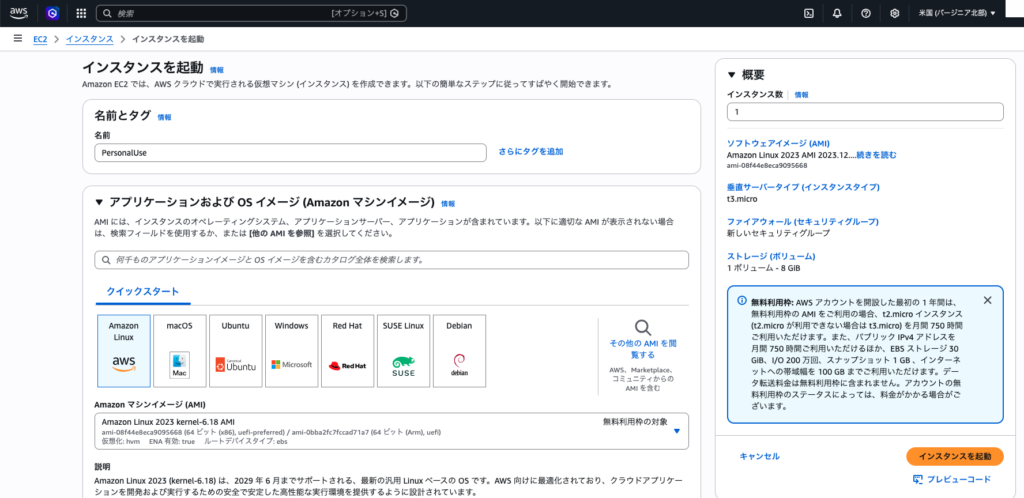
EC2インスタンスの作成
CDの実験のみ行えれば良いため、無料枠のある「t3.micro」を選択
(ただし、自分の場合はかなり昔にアカウントを作成し、数回使用した経験があったため無料枠はありませんでした)
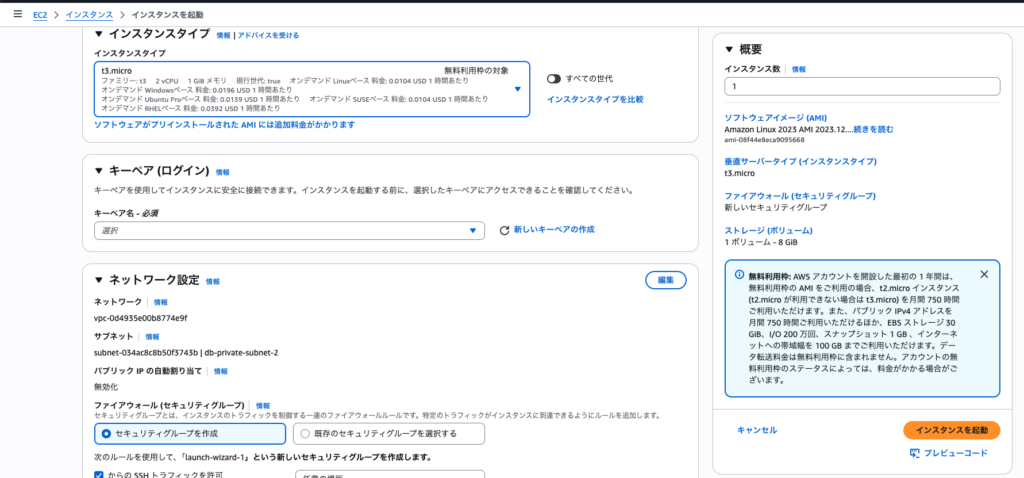
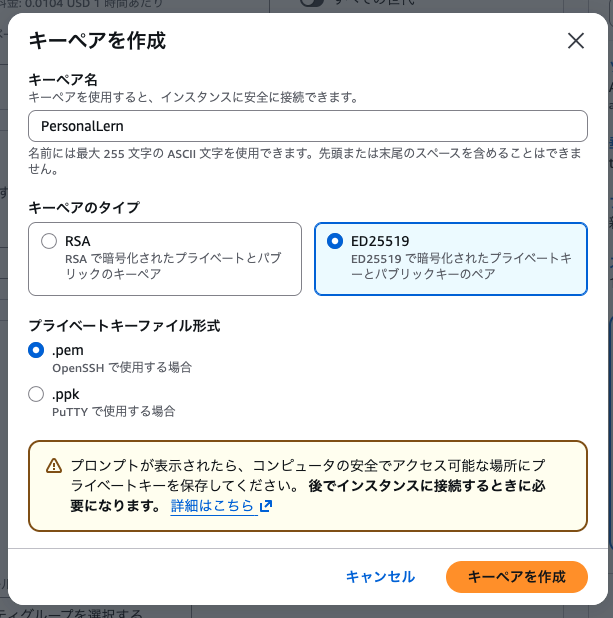
キーペアを作成します
ローカルPCからターミナルを利用してSSH接続する際に必要となります
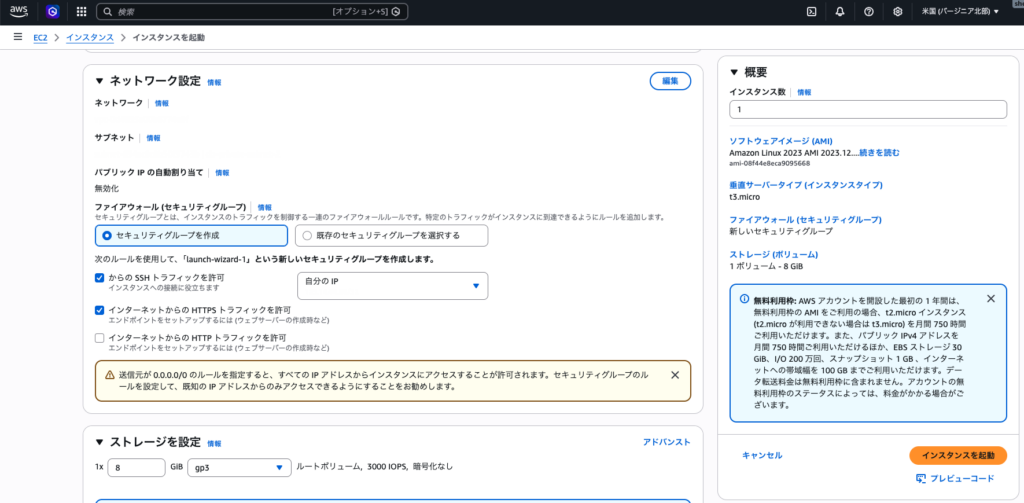
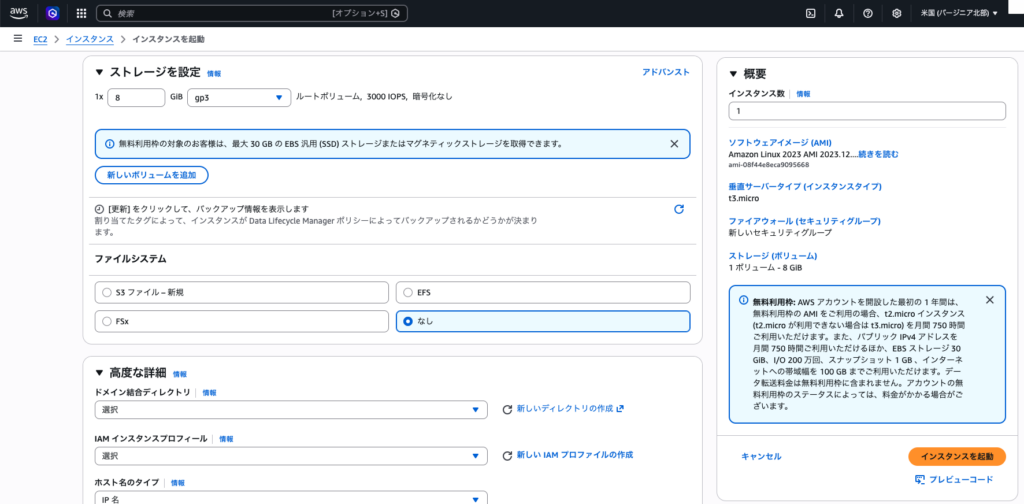
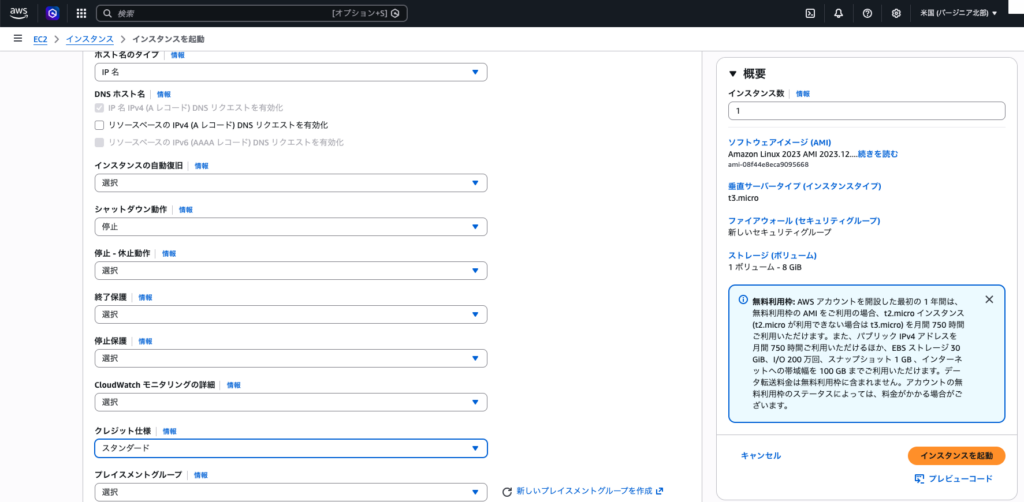
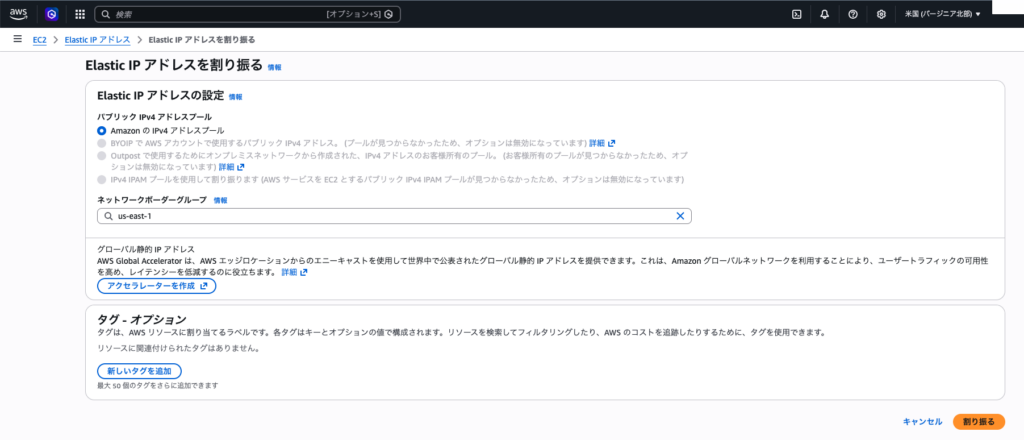
作成したEC2インスタンスにIPを割り当てて接続できるようにします
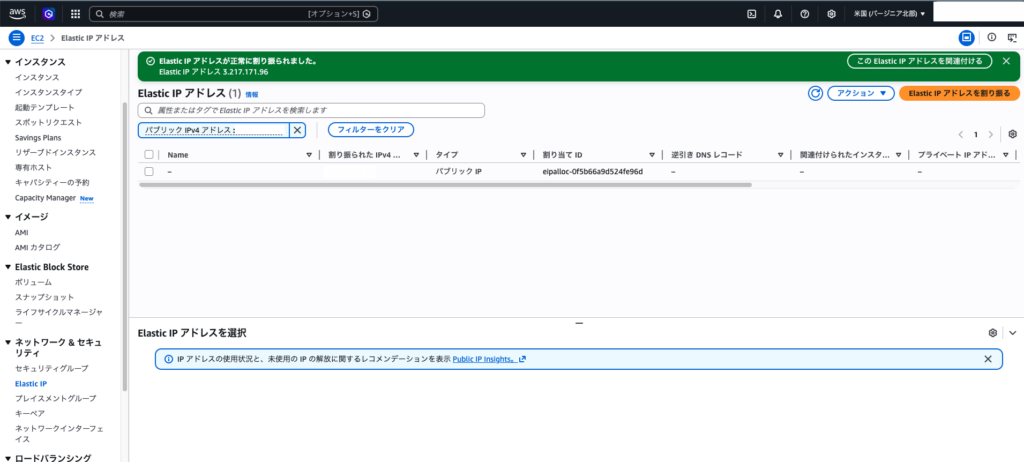
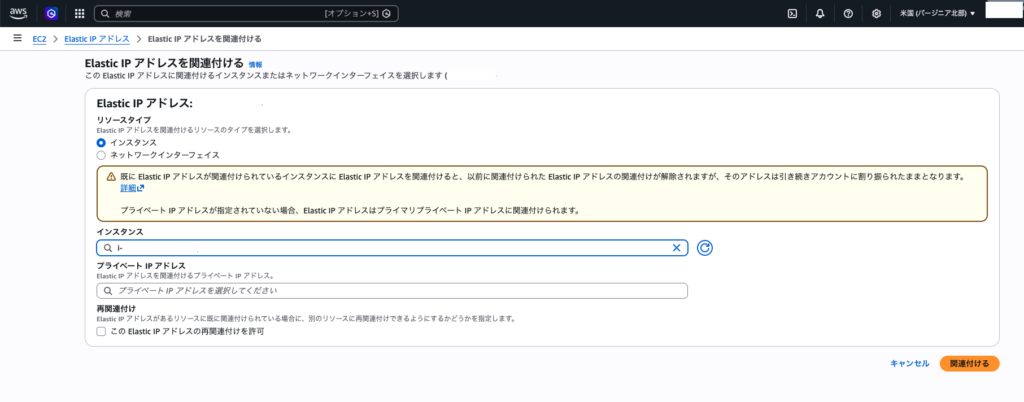
接続
IPアドレスが設定出来たらターミナルから接続してみます
AWSより接続用の鍵をローカルPCに保存し、以下のSShコマンドで接続します
(cdコマンドでカギ(ED25519ファイル)を保存したディレクトリに移動してください)
cd Project/AWS
ssh -i PersonalLern.pem ec2-user@IPアドレス
WordPressを設置してみる
まずはnginxをインストールします
sudo dnf update -y

sudo dnf install -y nginx
sudo systemctl start nginx
sudo systemctl enable nginx
上記コマンドでNginXが起動します
今後httpでアクセスできるように、80ポートを開けておきます
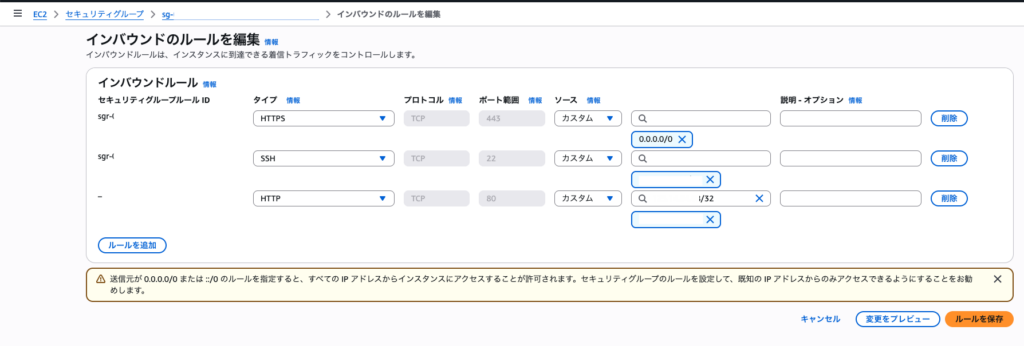
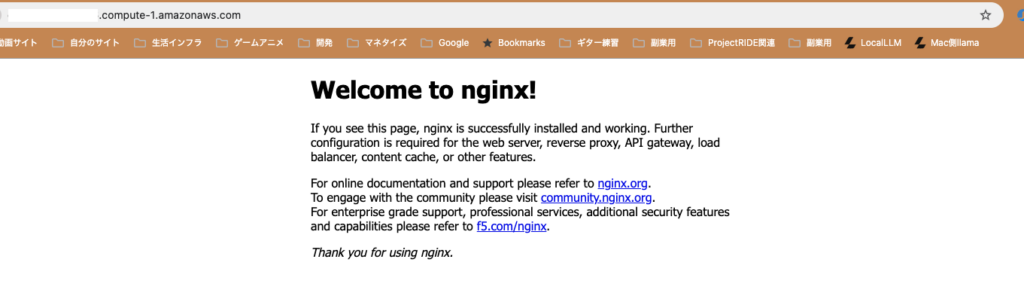
NginXが起動していれば、ウェルカム画面が表示されます
WordPress動作環境を整える
PHP-FPMをインストールする
sudo dnf install -y php php-fpm php-mysqlnd php-gd php-xml php-mbstring php-json
sudo systemctl start php-fpm
sudo systemctl enable php-fpm
MariaDBをインストールします
sudo dnf install -y mariadb1011-server
sudo systemctl start mariadb
sudo systemctl enable mariadb
sudo mysql_secure_installation
MariaDBの対話セットアップは以下のように設定しました
[ec2-user@ip- ~]$ sudo mysql_secure_installation

NOTE: RUNNING ALL PARTS OF THIS SCRIPT IS RECOMMENDED FOR ALL MariaDB
      SERVERS IN PRODUCTION USE!  PLEASE READ EACH STEP CAREFULLY!

In order to log into MariaDB to secure it, we'll need the current
password for the root user. If you've just installed MariaDB, and
haven't set the root password yet, you should just press enter here.

Enter current password for root (enter for none):
OK, successfully used password, moving on...

Setting the root password or using the unix_socket ensures that nobody
can log into the MariaDB root user without the proper authorisation.

You already have your root account protected, so you can safely answer 'n'.

Switch to unix_socket authentication [Y/n] n
 ... skipping.

You already have your root account protected, so you can safely answer 'n'.

Change the root password? [Y/n] n
 ... skipping.

By default, a MariaDB installation has an anonymous user, allowing anyone
to log into MariaDB without having to have a user account created for
them.  This is intended only for testing, and to make the installation
go a bit smoother.  You should remove them before moving into a
production environment.

Remove anonymous users? [Y/n] Y
 ... Success!

Normally, root should only be allowed to connect from 'localhost'.  This
ensures that someone cannot guess at the root password from the network.

Disallow root login remotely? [Y/n] Y
 ... Success!

By default, MariaDB comes with a database named 'test' that anyone can
access.  This is also intended only for testing, and should be removed
before moving into a production environment.

Remove test database and access to it? [Y/n] Y
 - Dropping test database...
 ... Success!
 - Removing privileges on test database...
 ... Success!

Reloading the privilege tables will ensure that all changes made so far
will take effect immediately.

Reload privilege tables now? [Y/n] Y
 ... Success!

Cleaning up...

All done!  If you've completed all of the above steps, your MariaDB
installation should now be secure.

Thanks for using MariaDB!
サービス起動確認
sudo systemctl status nginx
sudo systemctl status php-fpm
sudo systemctl status mariadb
WordPress用 DB作成
sudo mysql -u root -p

CREATE DATABASE wordpress CHARACTER SET utf8mb4 COLLATE utf8mb4_unicode_ci;
CREATE USER 'wpuser'@'localhost' IDENTIFIED BY 'パスワード';
GRANT ALL PRIVILEGES ON wordpress.* TO 'wpuser'@'localhost';
FLUSH PRIVILEGES;
EXIT;
WordPress本体設置
cd /tmp
wget https://wordpress.org/latest.tar.gz
tar -xzf latest.tar.gz
rm -f latest.tar.gz
sudo mv wordpress /var/www/html/
sudo chown -R nginx:nginx /var/www/html/wordpress
NginX設定変更
sudo vi /etc/nginx/conf.d/wordpress.conf

server {
    listen 80;
    server_name _;

    root /var/www/html/wordpress;
    index index.php index.html;

    location / {
        try_files $uri $uri/ /index.php?$args;
    }

    location ~ \.php$ {
        fastcgi_pass unix:/run/php-fpm/www.sock;
        fastcgi_index index.php;
        fastcgi_param SCRIPT_FILENAME $document_root$fastcgi_script_name;
        include fastcgi_params;
    }

    location ~ /\.ht {
        deny all;
    }
}
基本設定の一部を無効化
sudo vi /etc/nginx/nginx.conf
serverブロックを削除
NginXリロード
sudo nginx -t
sudo systemctl reload nginxwp-config周りの設定
cd /var/www/html/wordpress
sudo cp wp-config-sample.php wp-config.php
sudo vi wp-config.php

開いたファイルの以下を修正
define( 'DB_NAME', 'wordpress' );
define( 'DB_USER', 'wpuser' );
define( 'DB_PASSWORD', '設定したパスワード' );
wp-config.php設定後、EC2のアドレスにアクセスしてインストール画面が表示されるか確認する
http://IPアドレス/
WordPressのインストール
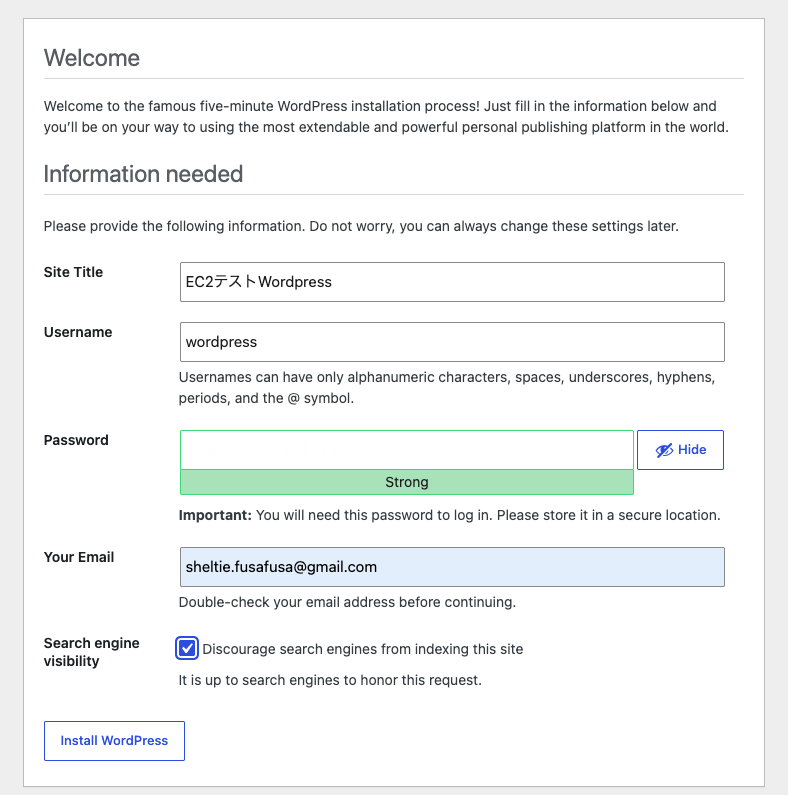
インストールを行い、Wordpressのブログ画面が表示されれば設定終了です
AWS CodeDeployを利用したデプロイ
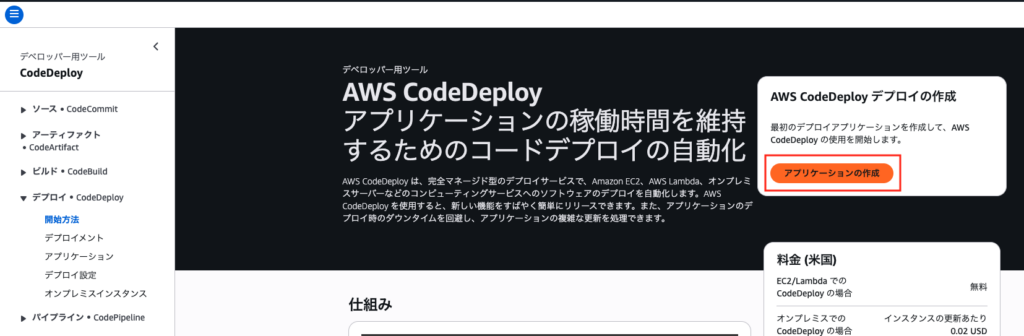
CodeDeployを利用してCD環境を作成します
GitHubへのプッシュをトリガーとしてリリースできるようにし、手動でのファイル転送を不要とします
将来的な展望として、サーバー台数が増えてもリリースが自動化できるというメリットもあります
EC2にCodeDeployエージェントをインストールします
sudo dnf install -y ruby wget

以下は北米(バージニア北部)の例なので、別リージョンならus-east-1の部分を変更してください
cd /home/ec2-user
wget https://aws-codedeploy-us-east-1.s3.us-east-1.amazonaws.com/latest/install

chmod +x ./install
sudo ./install auto

インストール確認
sudo systemctl status codedeploy-agent
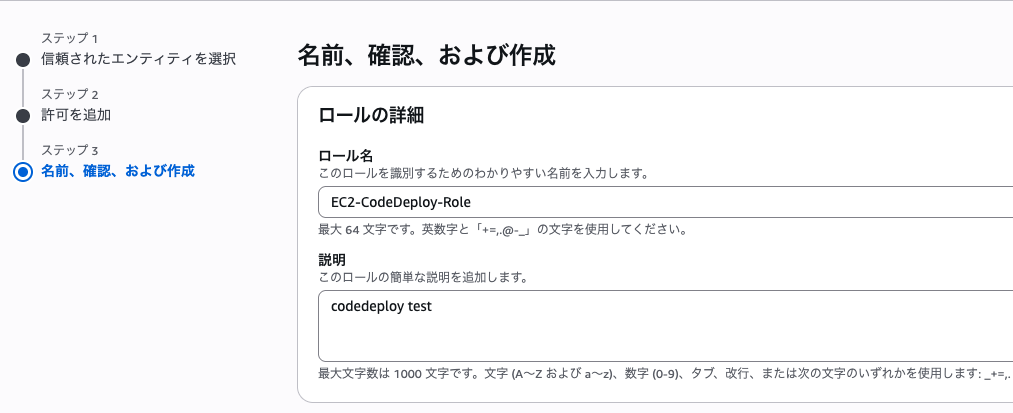
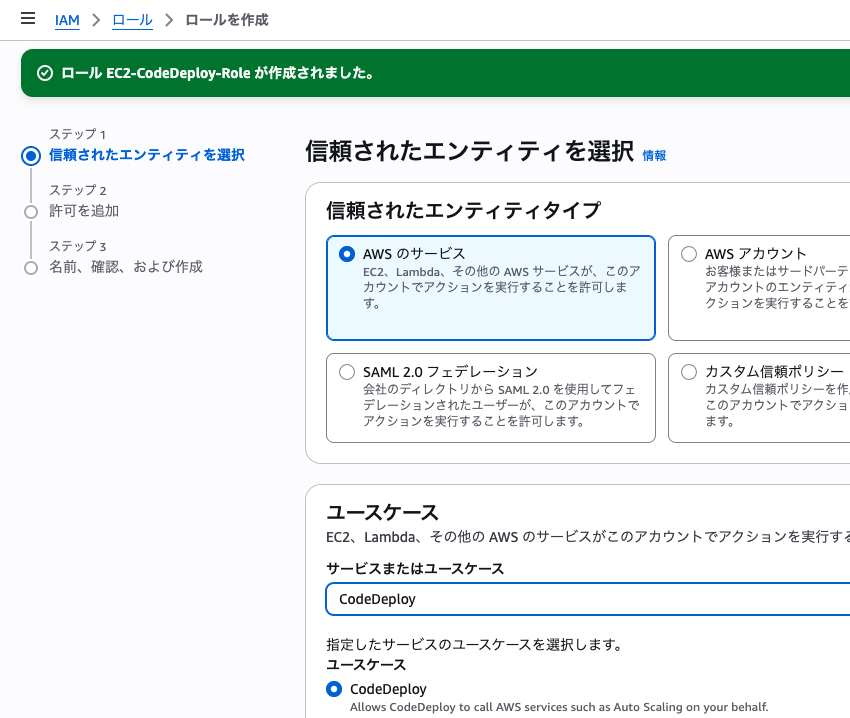
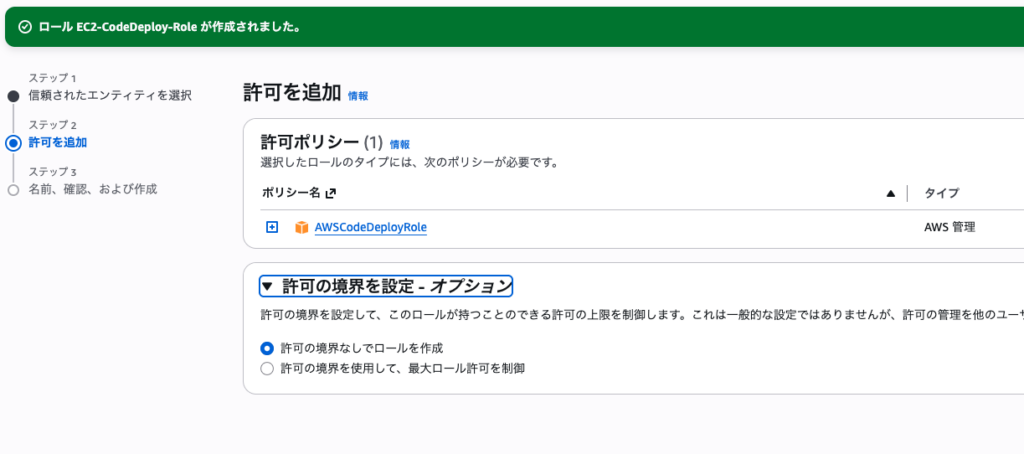
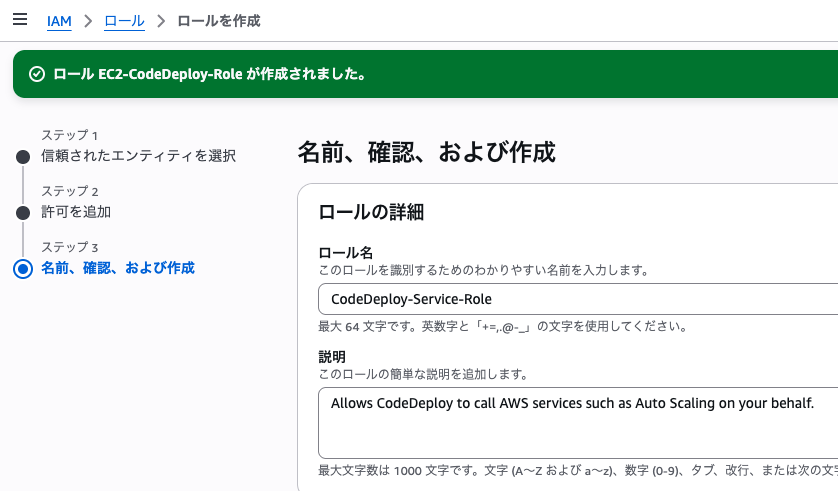
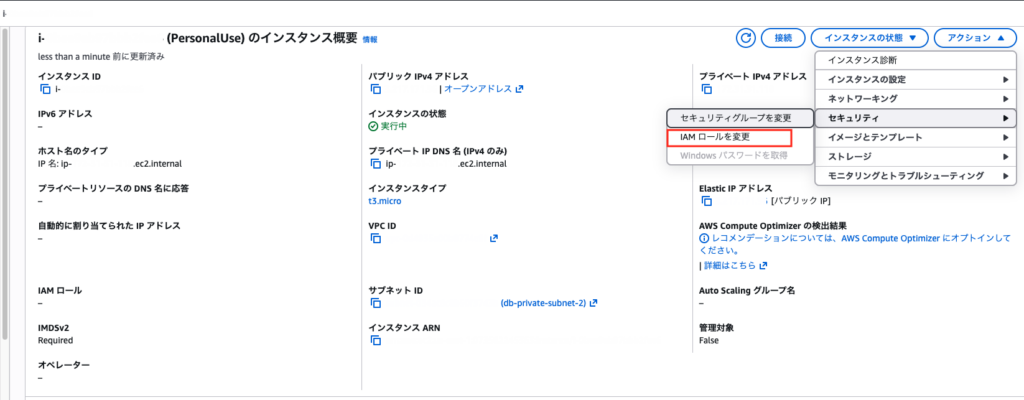
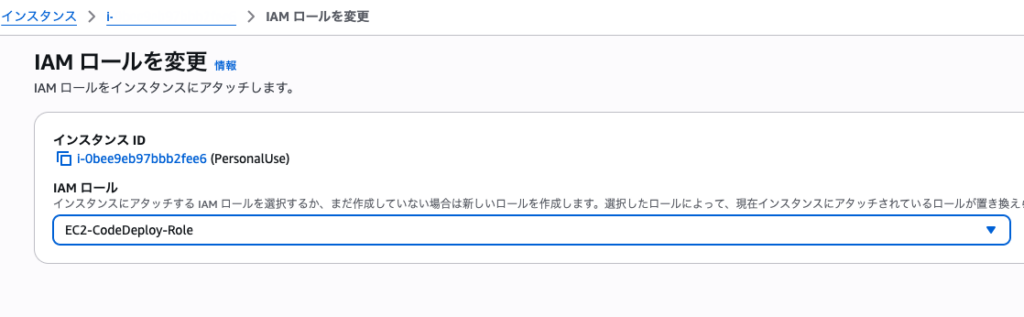
CodeDeploy用のIAMを作成
CodeDeploy用のIAMを作成します
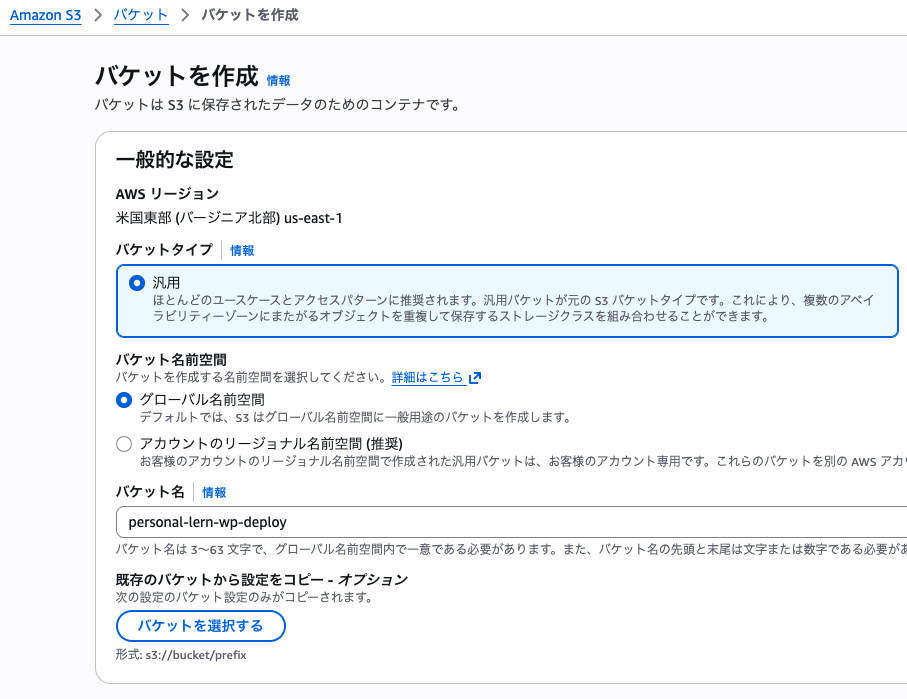
仕組みとして、リリース対象のコードを一度Amazon S3へ登録し、そのファイルをEC2へ転送します
そのため、S3ReadOnlyの属性を付与します
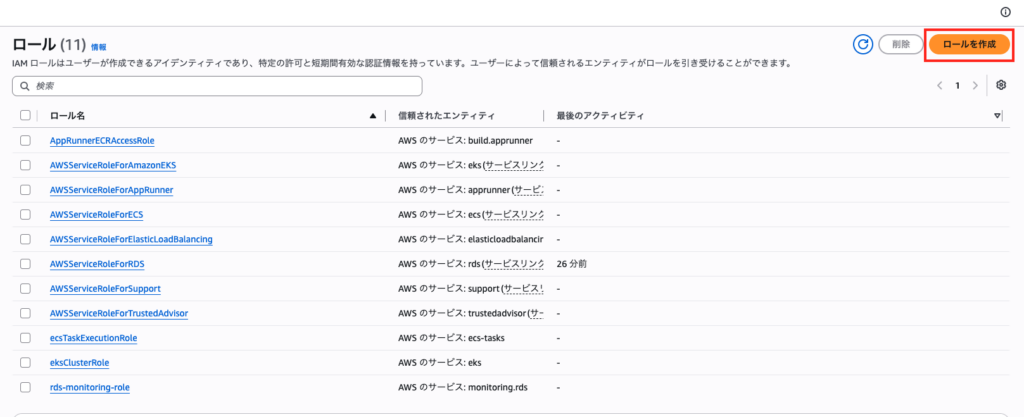
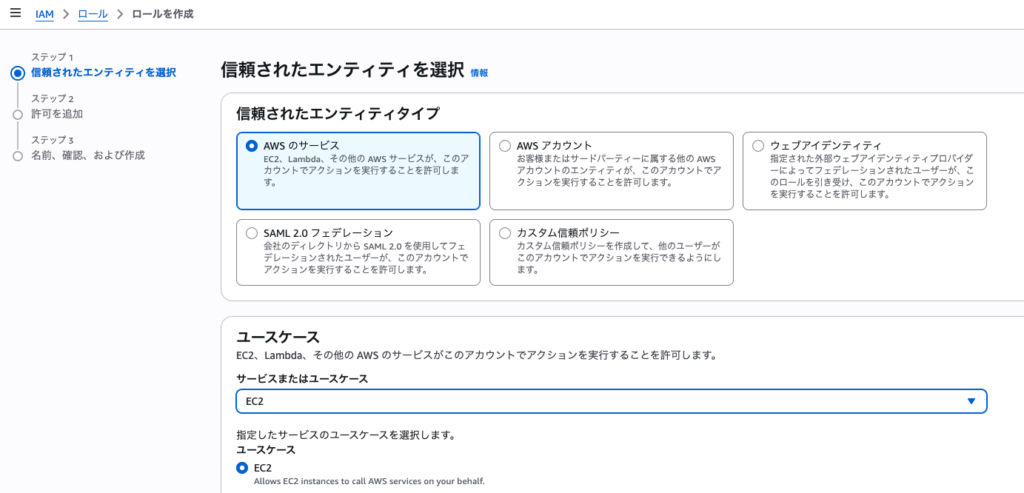
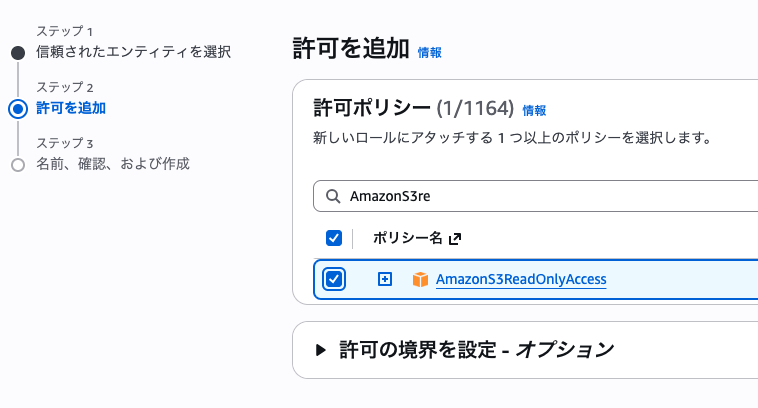
S3バケットの作成
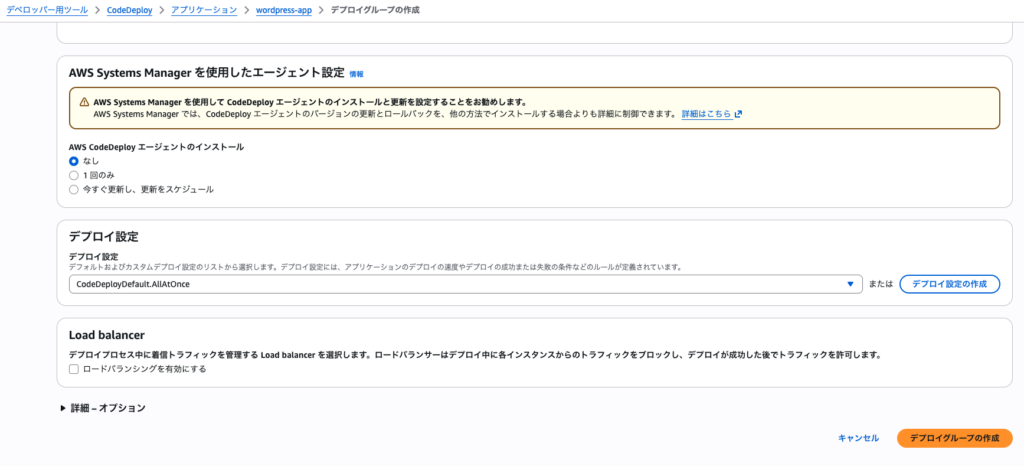
CodeDeployの設定
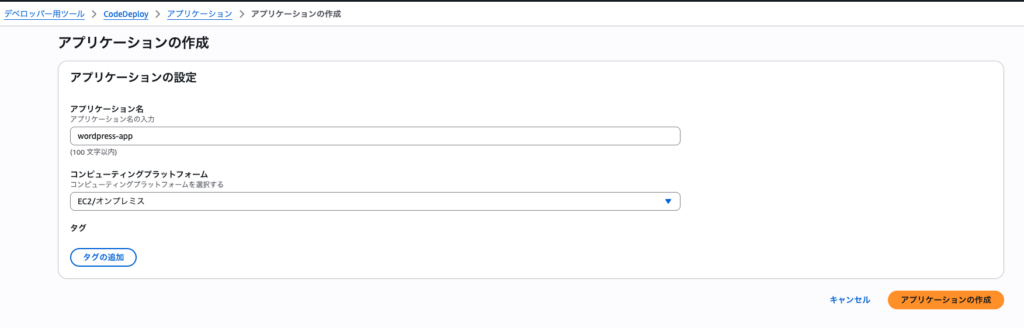
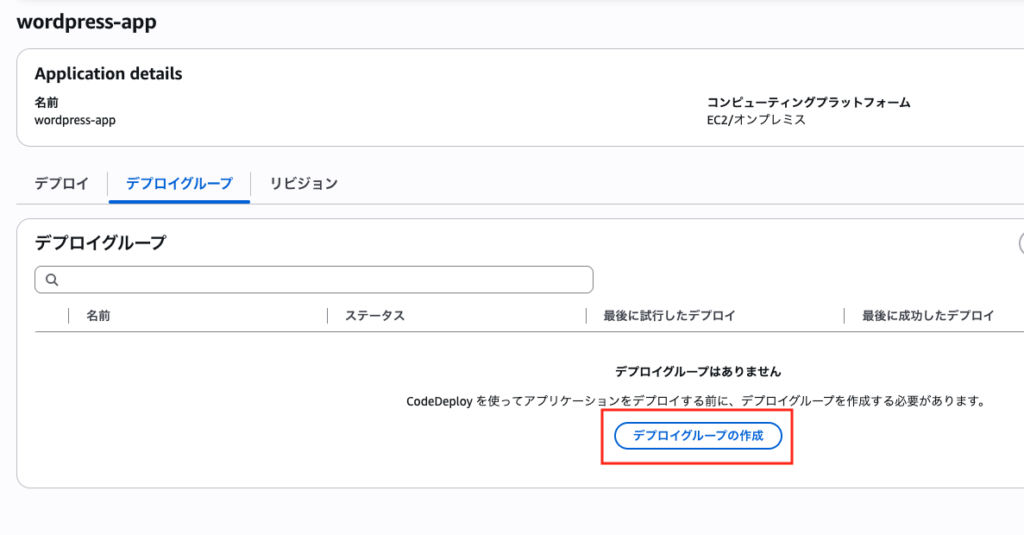
デプロイグループの設定は以下の通り
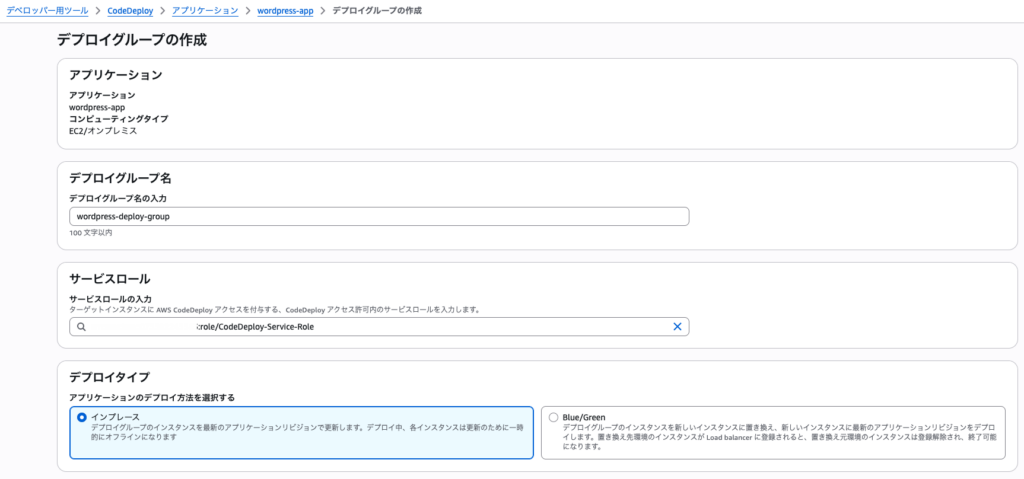
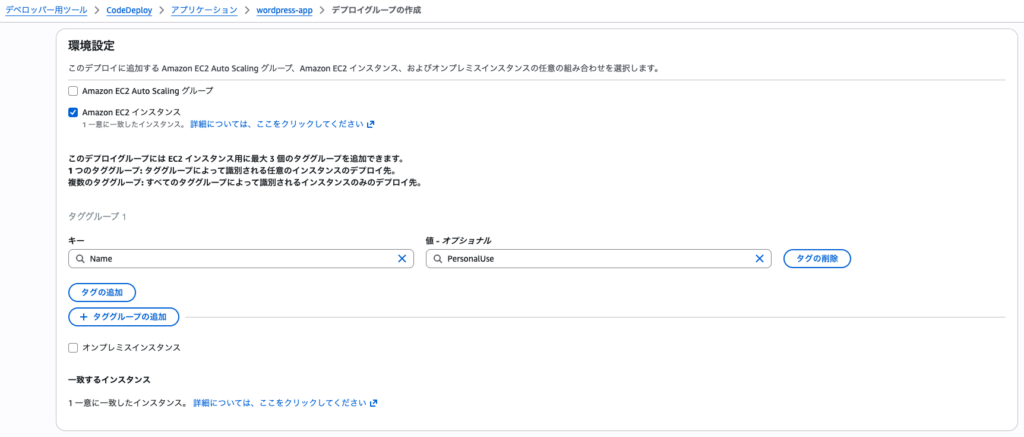
GitHubリポジトリの整備
以下の構成としました
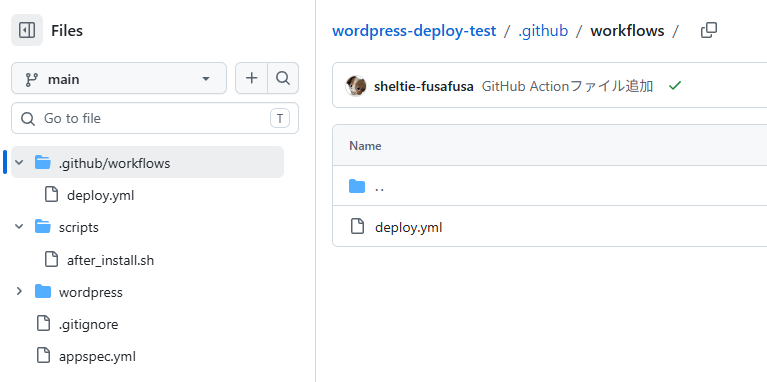
各ファイルの中身は以下になります
deploy.yml
(環境変数の設定は後程行います)
ファイル内の大まかな設定は
・mainブランチへのpushをトリガーとする
・OpenIDConnectを利用して認証を行い、zip圧縮したソースをS3にアップロード
・CodeDeployを利用して、S3からzipファイルを取得し、指定サーバーに展開
となっています
name: Deploy to EC2 via CodeDeploy

on:
  push:
    branches:
      - main

permissions:
  id-token: write
  contents: read

jobs:
  deploy:
    runs-on: ubuntu-latest

    steps:
      - name: Checkout
        uses: actions/checkout@v4

      - name: Configure AWS credentials (OIDC)
        uses: aws-actions/configure-aws-credentials@v4
        with:
          role-to-assume: ${{ secrets.AWS_ROLE_ARN }}
          aws-region: ${{ secrets.AWS_REGION }}

      - name: Zip and upload to S3
        run: |
          zip -r deploy.zip . -x "*.git*"
          aws s3 cp deploy.zip s3://${{ secrets.S3_BUCKET }}/deploy.zip

      - name: Deploy via CodeDeploy
        run: |
          aws deploy create-deployment \
            --application-name wordpress-app \
            --deployment-group-name wordpress-deploy-group \
            --s3-location bucket=${{ secrets.S3_BUCKET }},key=deploy.zip,bundleType=zip \
            --region ${{ secrets.AWS_REGION }}
after_install.sh
#!/bin/bash
systemctl restart php-fpm
systemctl restart nginx
.gitignore
# WordPress - ignore core, configuration, examples, uploads and logs.
# https://github.com/github/gitignore/blob/main/WordPress.gitignore

# Core
#
# Note: if you want to stage/commit WP core files
# you can delete this whole section/until Configuration.
/wp-admin/
/wp-content/index.php
/wp-content/languages
/wp-content/plugins/index.php
/wp-content/themes/index.php
/wp-includes/
/index.php
/license.txt
/readme.html
/wp-*.php
/xmlrpc.php

# Configuration
wp-config.php

# Example themes
/wp-content/themes/twenty*/

# Example plugin
/wp-content/plugins/hello.php

# Uploads
/wp-content/uploads/

# Log files
*.log

# htaccess
/.htaccess

# All plugins
#
# Note: If you wish to whitelist plugins,
# uncomment the next line
#/wp-content/plugins

# All themes
#
# Note: If you wish to whitelist themes,
# uncomment the next line
#/wp-content/themes
appspec.yml
CodeDeployの動作指示書のようなファイルです
ソースファイルの配置場所
ファイルが存在した場合の処理(今回は上書き)
ファイルパーミッションの変更
フックとして「AfterInstall(インストール終了後の処理)」が定義されています
after_install.shについては少し前に登場していますが、nginx, php-fpmの再起動が記述されています
version: 0.0
os: linux
files:
  - source: /
    destination: /var/www/html/wordpress
file_exists_behavior: OVERWRITE

permissions:
  - object: /var/www/html/wordpress
    pattern: "**"
    owner: nginx
    group: nginx

hooks:
  AfterInstall:
    - location: scripts/after_install.sh
      timeout: 300
      runas: root
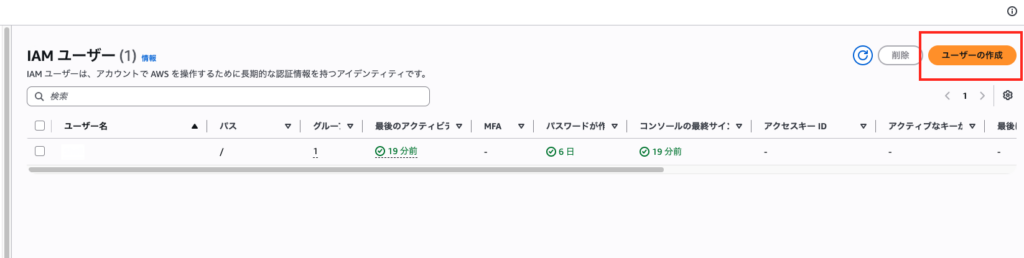
GitHubアクション用ユーザーの登録
GitHubActionで利用するためのユーザーを作成します
S3、CodeDeployの操作が必要なため、それぞれのポリシーを選択して付与しています
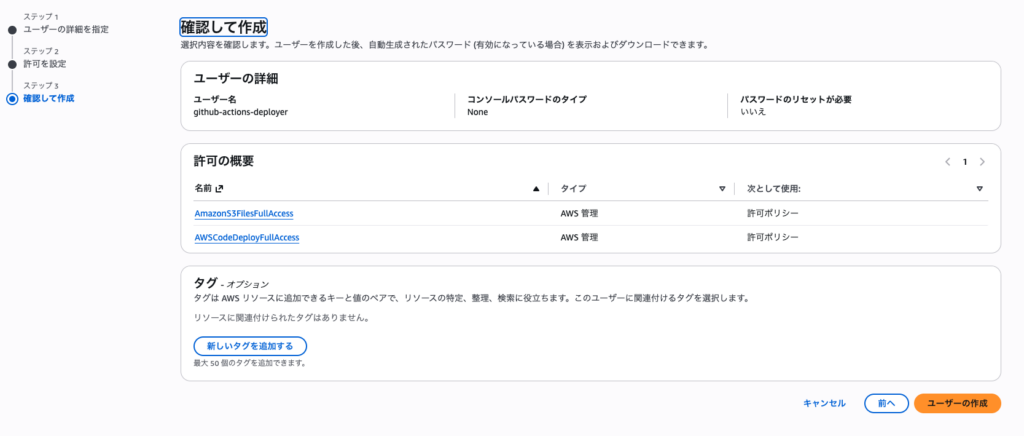
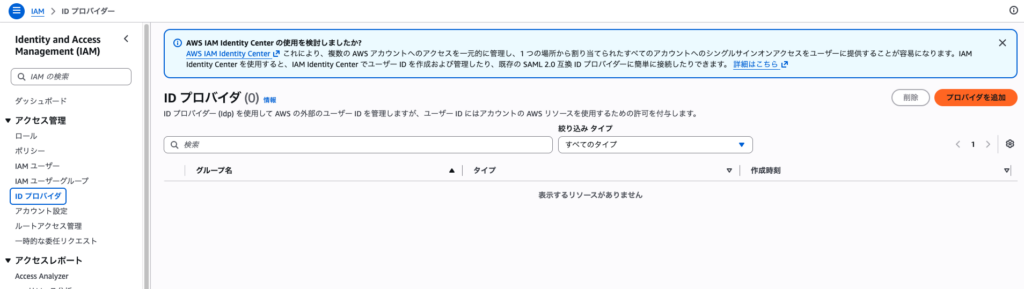
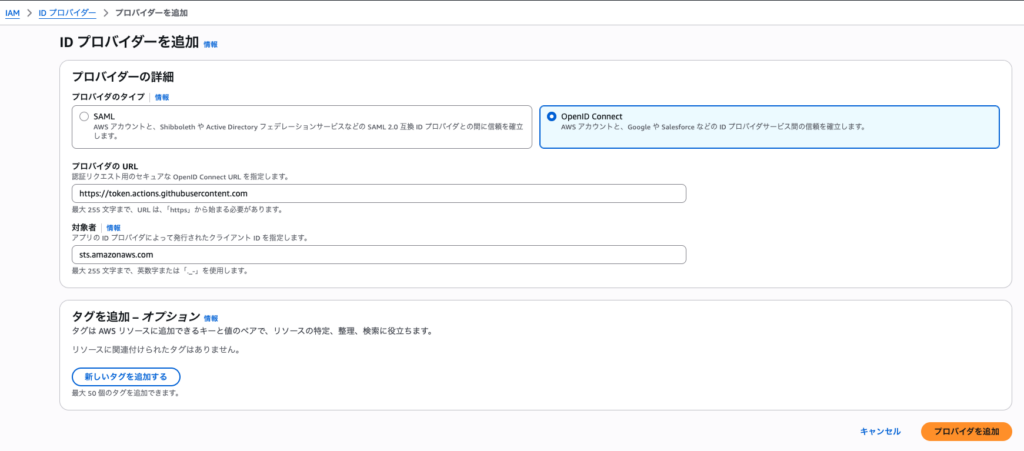
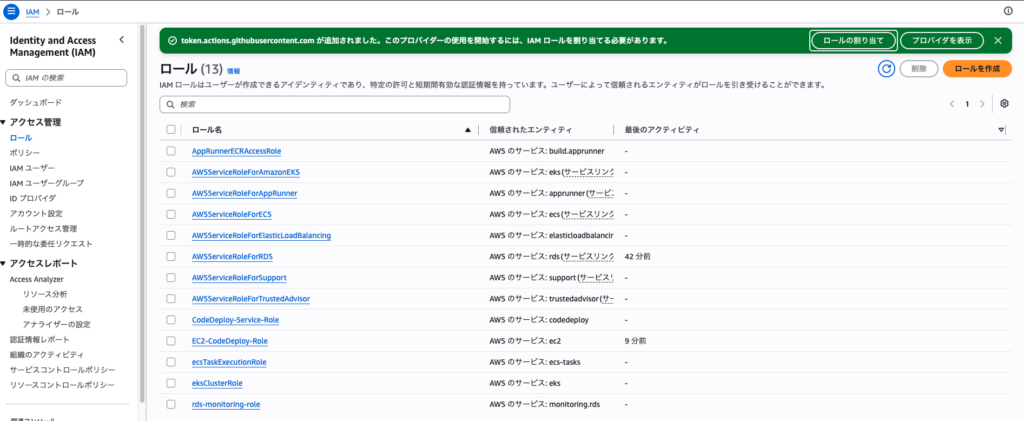
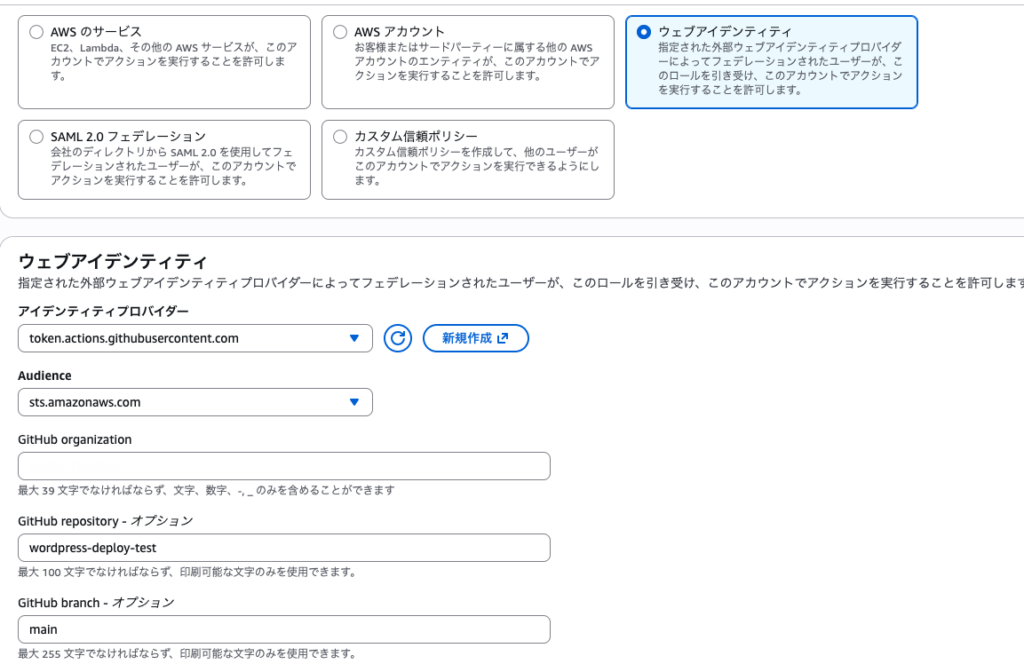
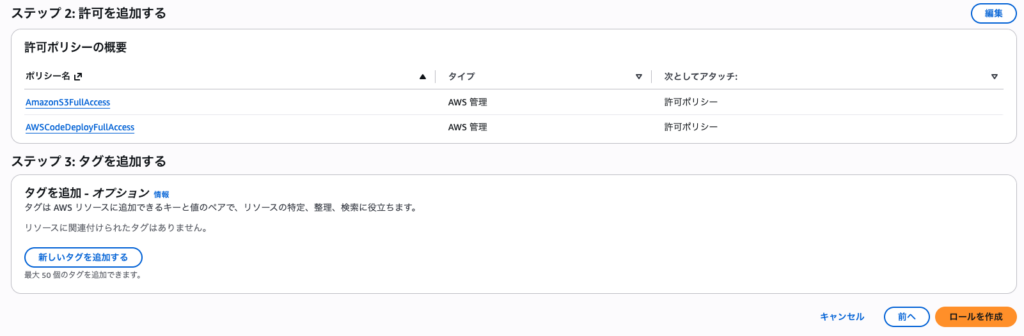
ユーザー作成の過程でARMが表示されるので、控えておきます
(GitHubに設定します)
GitHubのリポジトリセッティングからシークレットを登録します
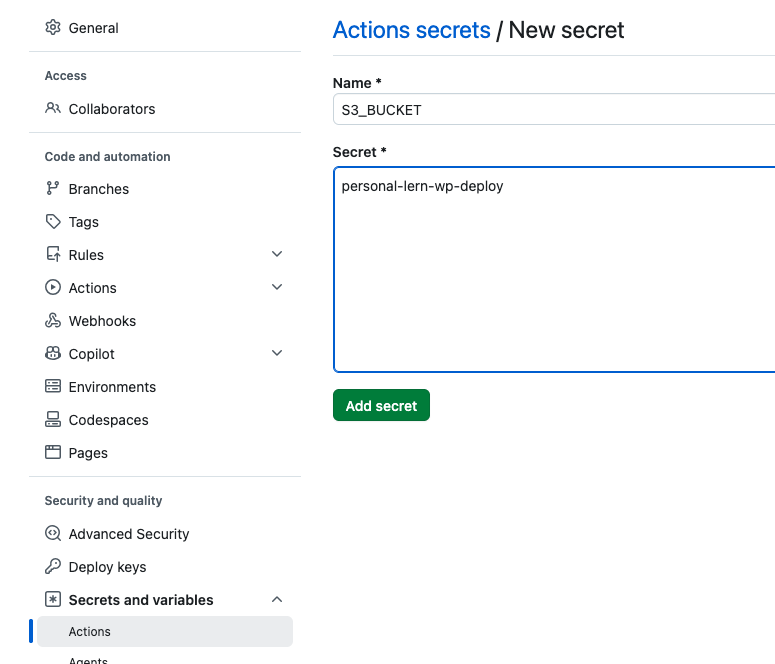
以下のように設定しました
AWS_REGION:作業中のAWSリージョン
AWS_ROLE_ARN:控えておいたARN
S3_BUCKET:作成したS3バケット
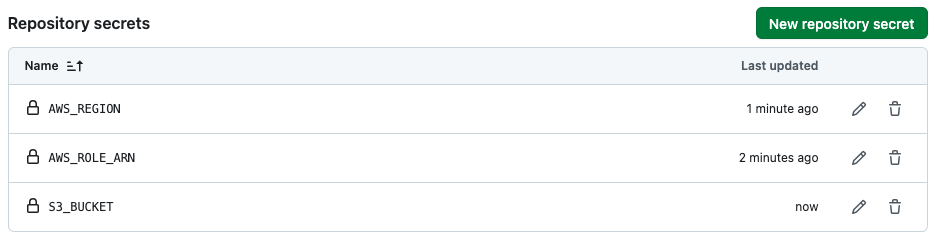
デプロイ確認
以上の設定でCodeDeployが動くようになっているはずです
GitHubのmainブランチに変更点をプッシュすると、GitHubアクションが動作し、CodeDeployが動きます

以上です
AWSのCodeDeployを使用したCDパイプライン構築をざっと紹介しました
CodeDeployを利用することでGitHub Actionと連携しソースデプロイを自動化することが出来ます
また、権限管理もAWSに集約される(ローカルからSFTPなどでサーバーにファイル転送するためのユーザー管理が不要になる)点でも、管理が楽になるのではないでしょうか
なかなかモダンクラウド環境を触る機会がなかったのですが、AWSコンソールも日本語化が進んでおり、大きく迷うことなく設定できました
AWSは従量課金なので、利用金額だけは注意が必要です