話題のお絵かきAI「Stable Diffusion」をIntel Macで動かします。
すでに実践されている方がいらしたので、以下の記事を参考にさせていただきました。
https://yaritakunai.hatenablog.com/entry/stable-diffusion-mps
Intel Macで動かすときの問題点
Stable Diffusionですが、公式の導入手順ではCudaを利用する設定となっており、Ver 11.3が要求されます。
ただ、Mac用のCudaはVer9で開発が終了しており、環境構築が行なえません。
Mac用Cudaは開発終了と公式で発表もありました。
https://applech2.com/archives/20200606-nvidia-cuda-end-of-support-macos.html
Cudaを利用しないように設定変更し、Stable Diffusionの環境を構築する
環境については、以下の通り
・MacBook Pro 16inch 2019
・macOS Monterey 12.5.1
・conda version : 4.10.3
Gtiからリポジトリ取得
以下のコマンドでリポジトリを取得します
git clone https://github.com/CompVis/stable-diffusion.git
cd stable-diffusion
Cudaを利用しないように変更
設定ファイルを以下のように変更します
vi environment.yaml

↓environment.yamlの中身
name: ldm
channels:
#  - pytorch
  - pytorch-nightly
  - defaults
dependencies:
  - python=3.8.5
  - pip=20.3
#  - cudatoolkit=11.3
#  - pytorch=1.11.0
#  - torchvision=0.12.0
  - pytorch
  - torchvision
  - numpy=1.19.2
  - pip:

以下変更なし
仮想環境作成
以下のコマンドで仮想環境を作成し、有効化します
conda env create -f environment.yaml
conda activate ldm
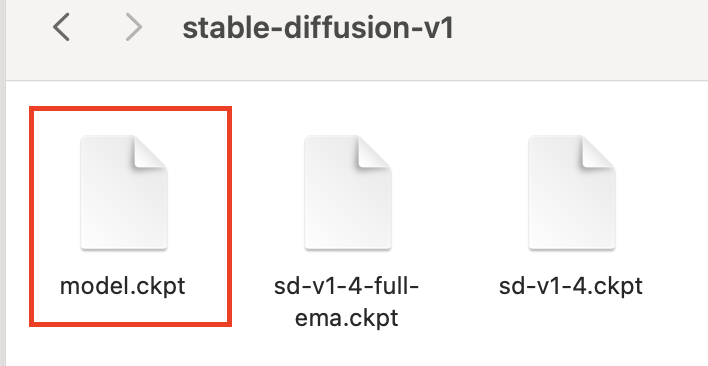
mkdir -p models/ldm/stable-diffusion-v1学習モデルをダウンロードする
Hugging Faceというサイトから学習データをダウンロードします(要会員登録)
会員登録後、以下のURLからモデルデータをダウンロードし、先ほど作成した「stable-diffusion-v1」フォルダに保存します
https://huggingface.co/CompVis/stable-diffusion-v-1-4-original
上記URLにアクセス後、ライセンスに同意し、モデルをダウンロードします
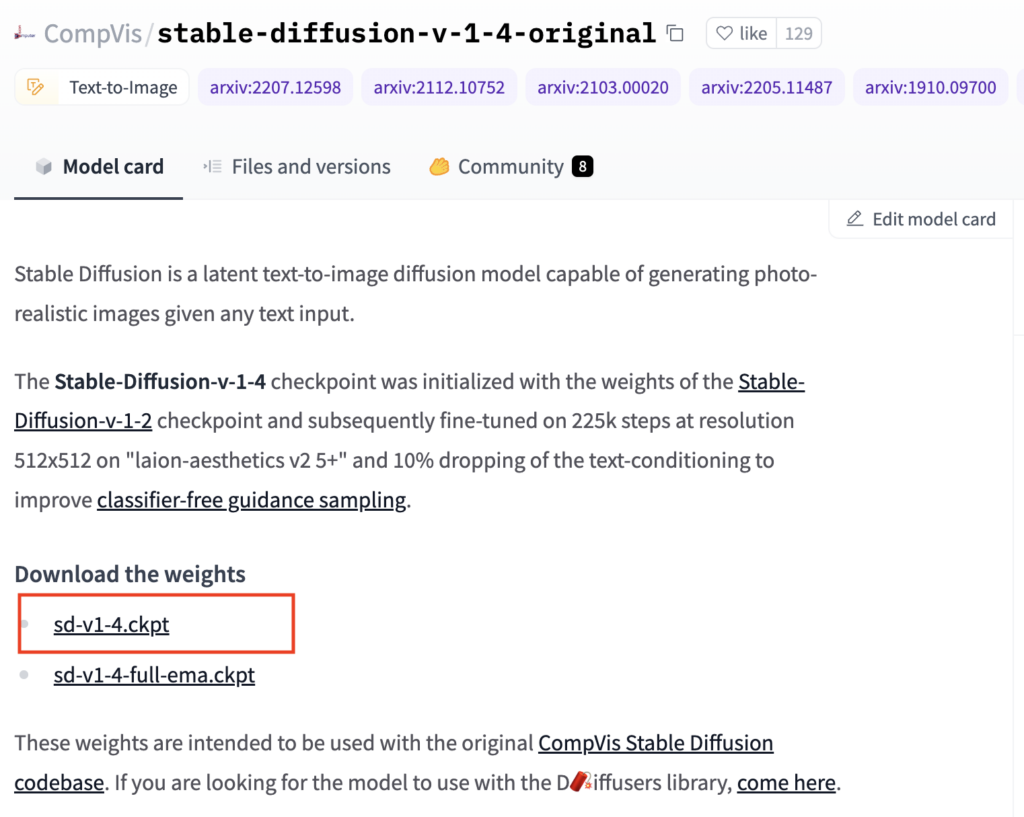
ダウンロード後、ファイル名を「model.ckpt」に変更します
トレーニングを実行してみる
以下のpythonファイルを作成し、実行してみます。ファイルは「stable-diffusion」フォルダの直下に作成しました
(プログラムは参考記事からの引用になります)
pytorch_m1_macbook.py
# -*- coding: utf-8 -*-
import torch
from torch.nn import CrossEntropyLoss
from torch.optim import SGD
from torch.utils.data import DataLoader
from torchvision.datasets import CIFAR10
from torchvision import transforms as tt
from torchvision.models import resnet18

import os
from argparse import ArgumentParser
import time

def main(device):
    # ResNetのハイパーパラメータ
    n_epoch = 5            # エポック数
    batch_size = 512       # ミニバッチサイズ
    momentum = 0.9         # SGDのmomentum
    lr = 0.01              # 学習率
    weight_decay = 0.00005 # weight decay

    # 訓練データとテストデータを用意
    mean = (0.491, 0.482, 0.446)
    std = (0.247, 0.243, 0.261)
    train_transform = tt.Compose([
        tt.RandomHorizontalFlip(p=0.5),
        tt.RandomCrop(size=32, padding=4, padding_mode='reflect'),
        tt.ToTensor(),
        tt.Normalize(mean=mean, std=std)
    ])
    test_transform = tt.Compose([tt.ToTensor(), tt.Normalize(mean, std)])
    root = os.path.dirname(os.path.abspath(__file__))
    train_set = CIFAR10(root=root, train=True,
                        download=True, transform=train_transform)
    train_loader = DataLoader(train_set, batch_size=batch_size,
                              shuffle=True, num_workers=8)

    # ResNetの準備
    resnet = resnet18()
    resnet.fc = torch.nn.Linear(resnet.fc.in_features, 10)

    # 訓練
    criterion = CrossEntropyLoss()
    optimizer = SGD(resnet.parameters(), lr=lr,
                    momentum=momentum, weight_decay=weight_decay)
    train_start_time = time.time()
    resnet.to(device)
    resnet.train()
    for epoch in range(1, n_epoch+1):
        train_loss = 0.0
        for inputs, labels in train_loader:
            inputs = inputs.to(device)
            optimizer.zero_grad()
            outputs = resnet(inputs)
            labels = labels.to(device)
            loss = criterion(outputs, labels)
            loss.backward()
            train_loss += loss.item()
            del loss  # メモリ節約のため
            optimizer.step()
        print('Epoch {} / {}: time = {}[s], loss = {:.2f}'.format(
            epoch, n_epoch, time.time() - train_start_time, train_loss))
    print('Train time on {}: {:.2f}[s] (Train loss = {:.2f})'.format(
        device, time.time() - train_start_time, train_loss))

    # 評価
    test_set = CIFAR10(root=root, train=False, download=True,
                       transform=test_transform)
    test_loader = DataLoader(test_set, batch_size=batch_size,
                             shuffle=False, num_workers=8)
    test_loss = 0.0
    test_start_time = time.time()
    resnet.eval()
    for inputs, labels in test_loader:
        inputs = inputs.to(device)
        outputs = resnet(inputs)
        labels = labels.to(device)
        loss = criterion(outputs, labels)
        test_loss += loss.item()
    print('Test time on {}: {:.2f}[s](Test loss = {:.2f})'.format(
        device, time.time() - test_start_time, test_loss))


if __name__ == '__main__':
    parser = ArgumentParser()
    parser.add_argument('--device', type=str, default='mps',
                        choices=['cpu', 'mps'])
    args = parser.parse_args()
    device = torch.device(args.device)
    main(device)
CPU、MPSでそれ実行した結果は以下のとおりです
python pytorch_m1_macbook.py --device cpu
Downloading https://www.cs.toronto.edu/~kriz/cifar-10-python.tar.gz to /Users/hamada/Project/MachineLarning/stable-diffusion/cifar-10-python.tar.gz
100%|████████████████████████| 170498071/170498071 [00:22<00:00, 7461526.71it/s]
Extracting /Users/hamada/Project/MachineLarning/stable-diffusion/cifar-10-python.tar.gz to /Users/hamada/Project/MachineLarning/stable-diffusion
Epoch 1 / 5: time = 323.73796010017395[s], loss = 169.02
Epoch 2 / 5: time = 628.1439380645752[s], loss = 135.66
Epoch 3 / 5: time = 929.2913389205933[s], loss = 122.78
Epoch 4 / 5: time = 1244.1902849674225[s], loss = 112.50
Epoch 5 / 5: time = 1558.1003341674805[s], loss = 104.66
Train time on cpu: 1558.10[s] (Train loss = 104.66)
Files already downloaded and verified
Test time on cpu: 64.05[s](Test loss = 20.15)
python pytorch_m1_macbook.py --device mps
Files already downloaded and verified
Epoch 1 / 5: time = 243.6470718383789[s], loss = 170.26
Epoch 2 / 5: time = 408.21199798583984[s], loss = 137.86
Epoch 3 / 5: time = 625.620924949646[s], loss = 123.72
Epoch 4 / 5: time = 857.4977359771729[s], loss = 113.30
Epoch 5 / 5: time = 1090.7507467269897[s], loss = 105.25
Train time on mps: 1090.75[s] (Train loss = 105.25)
Files already downloaded and verified
Test time on mps: 64.08[s](Test loss = 20.00)mpsを利用したほうが30%ほど高速に処理できるようです
上記プログラムの実行結果だけ見るとmpsが利用できそうですが、実際にイラスト生成プログラムを起動するとエラーが出て処理が中断されてしまいました。そのため、以降の記事ではcpuモードで動かせるように改修を行っています。
Pythonスクリプトを修正
プログラムを動作させるにあたり、Pythonスクリプトの修正を行います
scripts/txt2img.py
63行目あたりのmodel.cuda()の部分を以下のように修正
    if len(u) > 0 and verbose:
        print("unexpected keys:")
        print(u)

    # model.cuda()
    model.to('cpu')
    model.eval()
    return model
243行目辺りのdevice = torch.device(“cuda”) if torch.cuda.is_available() else torch.device(“cpu”)の部分を以下のように修正
    # device = torch.device("cuda") if torch.cuda.is_available() else torch.device("cpu")
    device = torch.device("cpu")
    model = model.to(device)
283行目辺りのwith precision_scope(“cuda”):の部分を以下のように修正
    with torch.no_grad():
        # with precision_scope("cuda"):
        with precision_scope("cpu"):
ldm/models/diffusion/plms.py
18行目辺りのif attr.device != torch.device(“cuda”):周辺を以下の通り修正
    def register_buffer(self, name, attr):
        if type(attr) == torch.Tensor:
            # if attr.device != torch.device("cuda"):
            #    attr = attr.to(torch.device("cuda"))
            if attr.device != torch.device("cpu"):
                attr = attr.to(torch.float32).to(torch.device("cpu")).contiguous()
        setattr(self, name, attr)
configs/stable-diffusion/v1-inference.yaml
69行目付近の設定を以下のように修正
    cond_stage_config:
      target: ldm.modules.encoders.modules.FrozenCLIPEmbedder
      params:
        device: cpu
ldm/modules/attention.py
211行目付近のdef _forward(self, x, context=None):を以下のように修正
    def _forward(self, x, context=None):
        x = x.contiguous()
        x = self.attn1(self.norm1(x)) + x
        x = self.attn2(self.norm2(x), context=context) + x
        x = self.ff(self.norm3(x)) + x
        return x
いよいよ実行してみる
以上の変更で動作するようになっているはずです。
テキストからイメージを作成するプログラムを実行し、イラストを生成してみましょう
(参考ページと同じだと面白くないので「一緒に寝ている犬と猫」という題目でイラストを生成しました)
python scripts/txt2img.py --prompt "cat and dog sleeping together" --plms --precision full生成された画像はリポジトリをクローンした直下のフォルダ配下に出力されます
outputs/txt2img-samples/
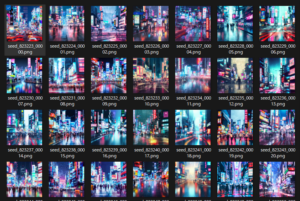
イラストが生成されるまで1時間40分ほどかかりました。生成された画像は以下になります
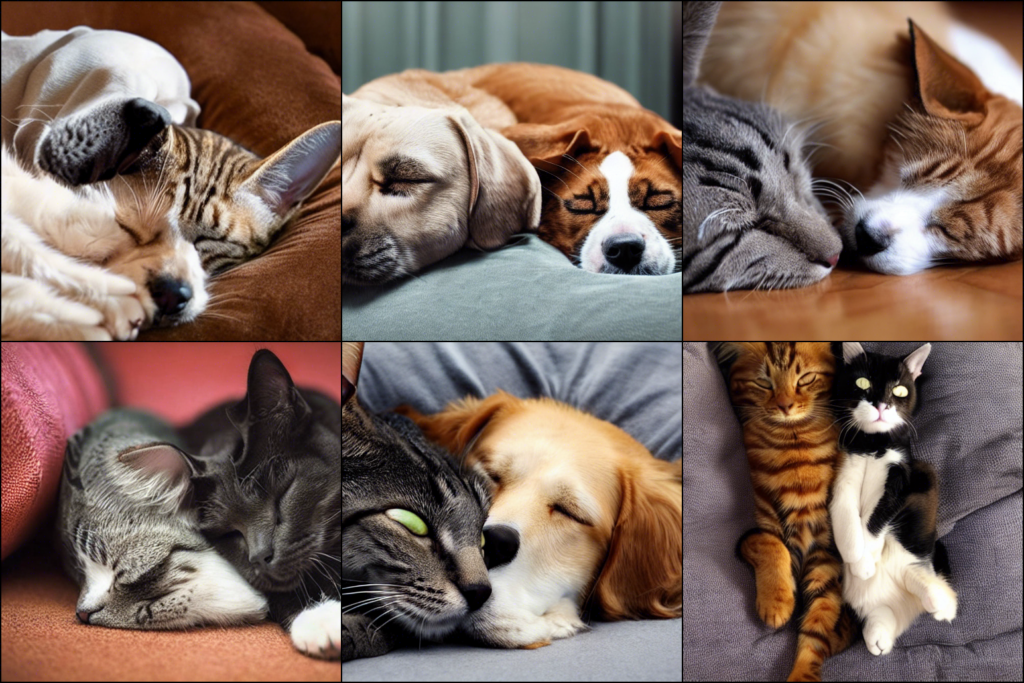
ざっと見それっぽい画像が生成されていますが、よく見ると形がいびつな部分があったりとちょっと怖い・・・
ただ、このクオリティの画像が2時間以内で生成されるというのは、すごいことなのではと思います
同じようなサービスで「midjourney」が有名ですが、あちらは数分で画像が生成されるのでかなり強力なバックエンドで処理してるんだろうなと思います。
他にも、最近「mimic」というイラスト生成サービスがリリースされましたが、こちらは色々物議を醸しているようです。
今後もイラストAIの進化は続くと思いますが、クリエイターとAIがうまく共存できるようなサービスが誕生することを願っています。
今回はここまで
ひとまず無事にイラスト生成ができるようになったところで、今回は一旦終了。
スクリプトフォルダの中に、img2imgやknn2imgなど面白そうなスクリプトが準備されていたので、こちらはまた時間を見つけて試してみたいと思います
エラー集
Traceback (most recent call last):
  File "scripts/txt2img.py", line 347, in <module>
    main()
  File "scripts/txt2img.py", line 285, in main
    with precision_scope("mps"):
  File "/opt/anaconda3/envs/ldm/lib/python3.8/site-packages/torch/amp/autocast_mode.py", line 199, in __init__
    raise RuntimeError('User specified autocast device_type must be \'cuda\' or \'cpu\'')
RuntimeError: User specified autocast device_type must be 'cuda' or 'cpu'
プログラム修正間違いがあり発生。見直して解消
RuntimeError: Invalid buffer size: 3.00 GB自分の環境ではmpsを利用すると上記エラーが発生してしまいました。
cpuを利用するモードに変更して解決しました。
RuntimeError: expected scalar type BFloat16 but found Float以下の記事を参考
https://zenn.dev/isaka102/scraps/2a37006ed35248
引数に「–precision full」を追加して解決